Saturday, 14 June 2014
Thursday, 16 January 2014
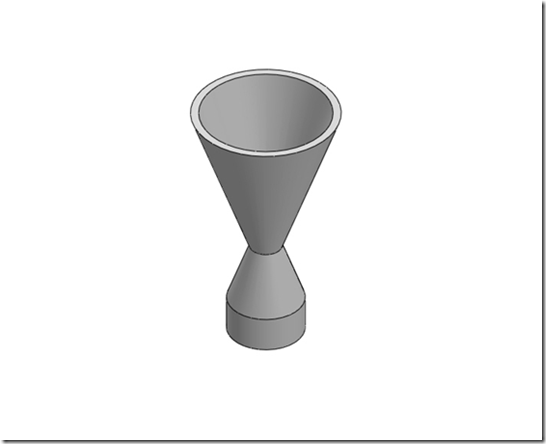
Simulation of Impact of PET venturi tube with rigid floor
Date: Tuesday, May 07, 2013
Designer: Ammar Aziz Study name: Impact testing by Ammar Analysis type: Drop Test
Disclaimer: The results of this simulation can not be used for any practical implementation.
| Solid Body | |||
| Document Name and Reference | Treated As | Volumetric Properties | Document Path/Date Modified |
| Venturi Impact | Solid Body | Mass:0.190265 kg Volume:0.00013399 m^3 Density:1420 kg/m^3 Weight:1.8646 N |
May 07 12:56:49 2013 |
Study Properties
| Study name | Venturi Impact |
| Analysis type | Drop Test |
| Mesh type | Solid Mesh |
| Large displacement | On |
| Result folder | SolidWorks document |
Setup Information
| Type | Drop height |
| Drop Height from Centroid | 2000 mm |
| Gravity | 9.81 m/s^2 |
| Gravity Reference | Top Plane |
| Friction Coefficient | 0 |
| Target Stiffness | Rigid target |
| Critical Damping Ratio | 0 |
Drop height is selected from the automatically detected geometric center of tube to the floor surface. So please not confuse this length with the distance between the lower portion of tube and floor surface
Also the friction between the tube and floor is neglected. This assumption is based on another assumption that tube is falling perfectly vertically, so that there is no side thrust which enhances the friction process during the impact.
The floor is assumed to be rigid. It implies all the potential energy of the tube is dissipated into the floor without any rejection of energy by floor back to tube.
Result Options
| Solution Time After Impact | 130.7 microsec |
| Save Results Starting From | 0 microsec |
| No. of Plots | 25 |
| No. of Graph Steps Per Plot | 20 |
| Number of vertex | 0 |
The simulated result span is b/w time of impact to 130 lacth second after the impact
Units
| Unit system: | SI (MKS) |
| Length/Displacement | mm |
| Temperature | Kelvin |
| Angular velocity | Rad/sec |
| Pressure/Stress | N/mm^2 (MPa) |
Material Properties
| Model Reference | Properties | Components | ||||||||||||||||
| |
| SolidBody 1(Shell3)(venturi tube) |
The model is assumed to be linear elastic and isotropic. It implies Hook’s law is valid during the entire simulation. Elastic modulus of material is approximately 3GPa.
Mesh Information
| Mesh type | Solid Mesh |
| Mesher Used: | Standard mesh |
| Automatic Transition: | Off |
| Include Mesh Auto Loops: | Off |
| Jacobian points | 4 Points |
| Element Size | 0.00511862 m |
| Tolerance | 0.000255931 m |
| Mesh Quality | High |
Mesh Information - Details
| Total Nodes | 13311 |
| Total Elements | 15359 |
| Maximum Aspect Ratio | 5.3887 |
| % of elements with Aspect Ratio < 3 | 99.5 |
| % of elements with Aspect Ratio > 10 | 0 |
| % of distorted elements(Jacobian) | 0 |
| Time to complete mesh(hh;mm;ss): | 00:00:21 |
It is a fine mesh with no distorted element. All the elements are less than aspect ratio of 3. Approximately 13 thousand nodes. So a good solution is expected.
Study Results
| Name | Type | Min | Max |
| Stress1 | VON: von Mises Stress | 1.50947 N/mm^2 (MPa) Node: 1927 | 35.3117 N/mm^2 (MPa) Node: 7042 |
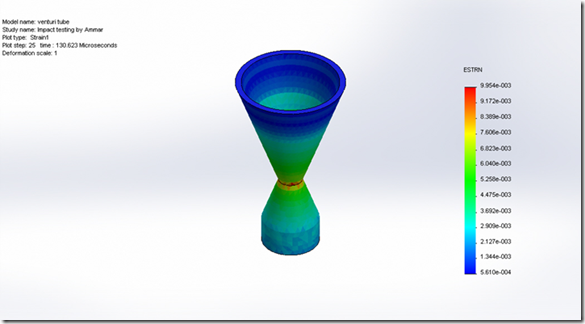
As the maximum stress generated due to impact is approximately 35 MPa which is well below the tensile strength of 3GPa. So our model is safe. But the neck is critical is the tube falls from more high heights.
| Name | Type | Min | Max |
| Strain1 | ESTRN: Equivalent Strain | 0.000561001 Element: 2362 | 0.00995434 Element: 3707 |
Conclusion:
you can see the most sensitive location is the neck of venturi tube if it falls from certain height vertically according to above scheme.
Disclaimer:
This simulation is just to describe the capability of solid works to simulate the impact test. Also it encourages the sound theoretical knowledge development.
CAD of a specific blade using Pro-E
What is CAD?
Computer-aided design (CAD) is the use of computer systems to assist in the creation, modification, analysis, or optimization of a design. CAD software is used to increase the productivity of the designer, improve the quality of design, improve communications through documentation, and to create a database for manufacturing. CAD output is often in the form of electronic files for print, machining, or other manufacturing operations.
Computer-aided design is used in many fields. Its use in designing electronic systems is known as Electronic Design Automation, or EDA. In mechanical design it is known as Mechanical Design Automation (MDA) or computer-aided drafting (CAD), which includes the process of creating a technical drawing with the use of computer software.
CAD software for mechanical design uses either vector-based graphics to depict the objects of traditional drafting, or may also produce raster graphics showing the overall appearance of designed objects. However, it involves more than just shapes. As in the manual drafting of technical and engineering drawings, the output of CAD must convey information, such as materials, processes, dimensions, and tolerances, according to application-specific conventions.
CAD may be used to design curves and figures in two-dimensional (2D) space; or curves, surfaces, and solids in three-dimensional (3D) space.
CAD is an important industrial art extensively used in many applications, including automotive, shipbuilding, and aerospace industries, industrial and architectural design, prosthetics, and many more. CAD is also widely used to produce computer animation for special effects in movies, advertising and technical manuals, often called DCC Digital content creation. The modern ubiquity and power of computers means that even perfume bottles and shampoo dispensers are designed using techniques unheard of by engineers of the 1960s. Because of its enormous economic importance, CAD has been a major driving force for research in computational geometry, computer graphics (both hardware and software), and discrete differential geometry.
The design of geometric models for object shapes, in particular, is occasionally called computer-aided geometric design (CAGD).
While the goal of automated CAD systems is to increase efficiency, they are not necessarily the best way to allow newcomers to understand the geometrical principles of Solid Modeling. For this, scripting languages such as PLASM (Programming Language of Solid Modeling) are more suitable.
Let us create the 3D model of a blade by using PRO-Engineer, but it is necessary to know what is PRO-Engineer ( if you are a beginner)
Pro-Engineer:
PTC Creo, formerly known as Pro/ENGINEER is a parametric, integrated 3D CAD/CAM/CAE solution created by Parametric Technology Corporation (PTC). It was the first to market with parametric, feature-based, associative solid modeling software. The application runs on Microsoft Windows platform, and provides solid modeling, assembly modelling and drafting, finite element analysis, Direct and Parametric modelling, Sub-divisional and nurbs surfacing and NC and tooling functionality for mechanical engineers. It features a suite of 10 Apps which are work within the same program. Versions for UNIX systems were discontinued with the release of version 4.0, except Solaris on x86-64.
The Pro/ENGINEER name was changed to Creo Elements/Pro, also known as Wildfire 5.0 on October 28, 2010, coinciding with PTC’s announcement of Creo, a new design software application suite. Creo Elements/Pro will be discontinued after version 2 in favour of the Creo design suite.
Creo Elements/Pro and now Creo Parametric competes in the market with CATIA and NX (Unigraphics) and Solidworks.
Let us create the 3D model of the drawing step by step using pro engineer. Here is a model of a specific blade with given dimensions, let us start:
Given drawing:
Given Dimensions:
R1= 150
R2= 99
Beta=30
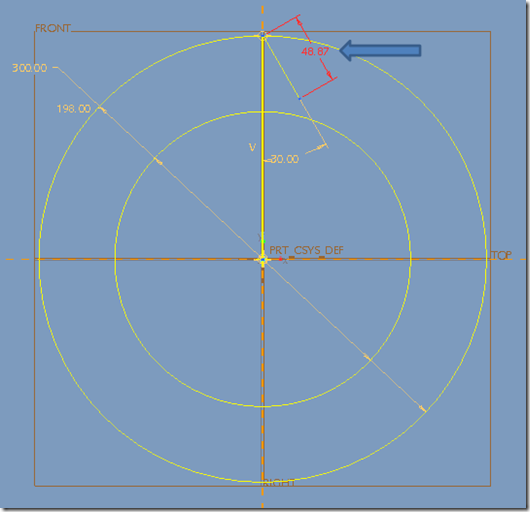
AC=BC=48.87
δ = 73.48
Step by Step procedure ………..
Step 2: Choose a particular sketch
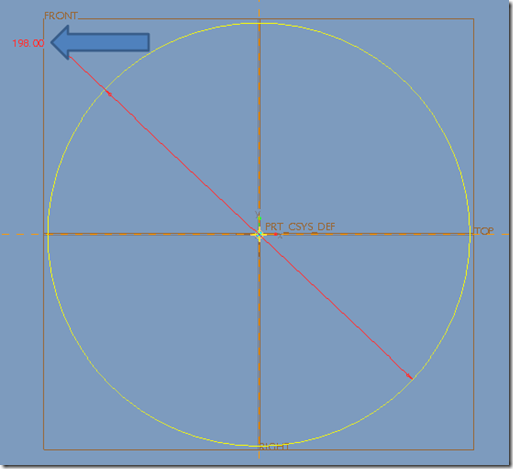
Step 3: Draw a circle with ‘99’ radius
Step 4: Draw a circle with ‘150’ radius
Step 5: Draw a vertical line
Step 6: Draw another line with ’30 degree’ angle
Step 7: Change the length to ’48.87’
Step 8: From that draw another line with ’73.48 degree’
Step 9: Change the length to ’48.87’ also
Step 10: Draw a circle which pass through the two points
Step 11: Offset the curve to ‘5’
Step 12: Trim the remaining unnecessary sketch
Step 13: Extrude the curve
So it is complete now. Hope you enjoy the tutorial.
Tuesday, 14 January 2014
Designing Windmill Using Solid Works
A windmill is a machine that converts the energy of wind into rotational energy by means of vanes called sails or blades.[1][2] The reason for the name "windmill" is that the devices originally were developed for milling grain for food production; the name stuck when in the course of history, windmill machinery was adapted to supply power for many industrial and agricultural needs other than milling.[3] The majority of modern windmills take the form of wind turbines used to generate electricity, or windpumps used to pump water, either for land drainage or to extract groundwater
An Introduction to Flow Analysis Applications with SolidWorks Flow Simulation, Student Guide
Computational fluid dynamics, usually abbreviated as CFD, is a branch of fluid mechanics that uses numerical methods and algorithms to solve and analyze problems that involve fluid flows. Computers are used to perform the calculations required to simulate the interaction of liquids and gases with surfaces defined by boundary conditions. With high-speed supercomputers, better solutions can be achieved. Ongoing research yields software that improves the accuracy and speed of complex simulation scenarios such as transonic or turbulent flows. Initial experimental validation of such software is performed using a wind tunnel with the final validation coming in full-scale testing, e.g. flight tests.
CO 2 Car Design Project with SolidWorks ® Software
CO2 dragsters are miniature racing cars which are rocket-powered by a carbon dioxide cartridge, pierced to start the release of the gas, and which race on a typically 65 foot track. They are frequently used to demonstrate mechanical principles such as mass, force, acceleration, or aerodynamics . Two hooks (eyelets or screw eyes) linked to a string (usually monofilament fishing line) the bottom of the car prevent the vehicle from losing control during launch. In a race, a laser scanner records the speed of the car at the end of its run. Often, the dragster is carved out of balsa wood because of its light weight.[1][2]
CO2 cars are a part of engineering curriculae in diverse parts of the world such as Australia, New Zealand[1] and the United States[2]. In the United States, classroom projects and competitions can operate under the aegis of the Technology Student Association at middle school and high school levels.[3][4] Competitions can be featured in local newspapers.[5] Students learn about the forces of gravity, drag, wind resistance, and the motion of air as a fluid. The projects mainly test the aerodynamic, mass and friction properties of a car. These forces can influence performance in a race, so it is vital to take them into account when building
Sunday, 12 January 2014
Design a Bridge by using Solid works

