What is CAD?
Computer-aided design (CAD) is the use of computer systems to assist in the creation, modification, analysis, or optimization of a design. CAD software is used to increase the productivity of the designer, improve the quality of design, improve communications through documentation, and to create a database for manufacturing. CAD output is often in the form of electronic files for print, machining, or other manufacturing operations.
Computer-aided design is used in many fields. Its use in designing electronic systems is known as Electronic Design Automation, or EDA. In mechanical design it is known as Mechanical Design Automation (MDA) or computer-aided drafting (CAD), which includes the process of creating a technical drawing with the use of computer software.
CAD software for mechanical design uses either vector-based graphics to depict the objects of traditional drafting, or may also produce raster graphics showing the overall appearance of designed objects. However, it involves more than just shapes. As in the manual drafting of technical and engineering drawings, the output of CAD must convey information, such as materials, processes, dimensions, and tolerances, according to application-specific conventions.
CAD may be used to design curves and figures in two-dimensional (2D) space; or curves, surfaces, and solids in three-dimensional (3D) space.
CAD is an important industrial art extensively used in many applications, including automotive, shipbuilding, and aerospace industries, industrial and architectural design, prosthetics, and many more. CAD is also widely used to produce computer animation for special effects in movies, advertising and technical manuals, often called DCC Digital content creation. The modern ubiquity and power of computers means that even perfume bottles and shampoo dispensers are designed using techniques unheard of by engineers of the 1960s. Because of its enormous economic importance, CAD has been a major driving force for research in computational geometry, computer graphics (both hardware and software), and discrete differential geometry.
The design of geometric models for object shapes, in particular, is occasionally called computer-aided geometric design (CAGD).
While the goal of automated CAD systems is to increase efficiency, they are not necessarily the best way to allow newcomers to understand the geometrical principles of Solid Modeling. For this, scripting languages such as PLASM (Programming Language of Solid Modeling) are more suitable.
Let us create the 3D model of a blade by using PRO-Engineer, but it is necessary to know what is PRO-Engineer ( if you are a beginner)
Pro-Engineer:
PTC Creo, formerly known as Pro/ENGINEER is a parametric, integrated 3D CAD/CAM/CAE solution created by Parametric Technology Corporation (PTC). It was the first to market with parametric, feature-based, associative solid modeling software. The application runs on Microsoft Windows platform, and provides solid modeling, assembly modelling and drafting, finite element analysis, Direct and Parametric modelling, Sub-divisional and nurbs surfacing and NC and tooling functionality for mechanical engineers. It features a suite of 10 Apps which are work within the same program. Versions for UNIX systems were discontinued with the release of version 4.0, except Solaris on x86-64.
The Pro/ENGINEER name was changed to Creo Elements/Pro, also known as Wildfire 5.0 on October 28, 2010, coinciding with PTC’s announcement of Creo, a new design software application suite. Creo Elements/Pro will be discontinued after version 2 in favour of the Creo design suite.
Creo Elements/Pro and now Creo Parametric competes in the market with CATIA and NX (Unigraphics) and Solidworks.
Let us create the 3D model of the drawing step by step using pro engineer. Here is a model of a specific blade with given dimensions, let us start:
Given drawing:
Given Dimensions:
R1= 150
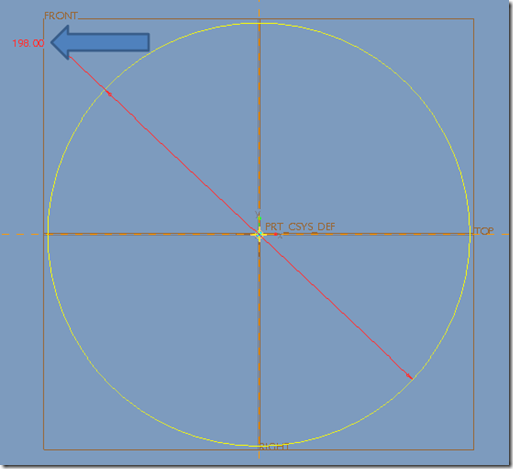
R2= 99
Beta=30
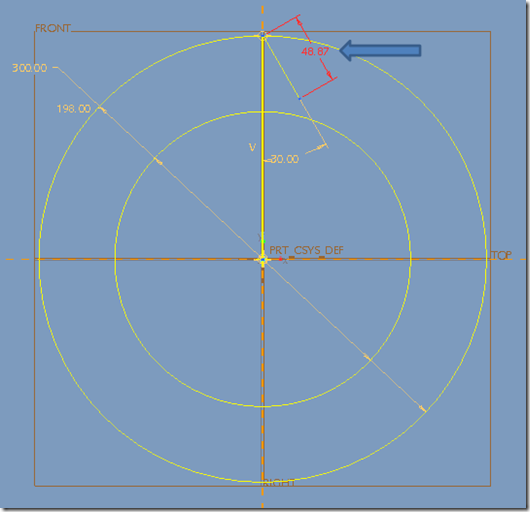
AC=BC=48.87
δ = 73.48
Step by Step procedure ………..
Step 2: Choose a particular sketch
Step 3: Draw a circle with ‘99’ radius
Step 4: Draw a circle with ‘150’ radius
Step 5: Draw a vertical line
Step 6: Draw another line with ’30 degree’ angle
Step 7: Change the length to ’48.87’
Step 8: From that draw another line with ’73.48 degree’
Step 9: Change the length to ’48.87’ also
Step 10: Draw a circle which pass through the two points
Step 11: Offset the curve to ‘5’
Step 12: Trim the remaining unnecessary sketch
Step 13: Extrude the curve
So it is complete now. Hope you enjoy the tutorial.


No comments:
Post a Comment